Tuesday, July 8, 2014

General Useful Palo Alto Networks Firewall (PAN-OS) CLI Commands


General system health


show system info –provides the system’s management IP, serial number and code version
show system statistics – shows the real time throughput on the device
show system software status – shows whether various system processes are running
show jobs processed – used to see when commits, downloads, upgrades, etc. are completed
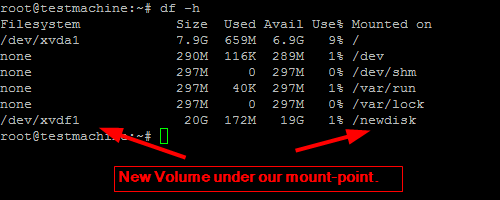
show system disk--space-- show percent usage of disk partitions
show system logdb--quota – shows the maximum log file sizes
debug dataplane internal vif link – show management interface (eth0) counters


If you find this tutorial useful, please consider making a donation to support future work like this:


Thank you :)


Monitor CPUs


show system resources -- shows processes running in the management plane similar to “top” command
show running resource--monitor – used to see the resource utilization in the data plane, such as dataplane CPU utilization
less mp--log mp--monitor.log – Every 15 minutes the system runs a script to monitor management plane resource usage, output is stored in this file.
less dp--log dp--monitor.log -- Every 15 minutes the system runs a script to monitor dataplane resource usage, output is stored in this file.

General dropped packet troubleshooting

ping source host -- allows to ping from the specified FW source interface
ping host -- ping from the MGT interface
show session all | match – used to show specific sessions in the session table. You can
enter any text after the word match. A good example would be a source or destination IP or an application
show session all | filter destination dest--port -- shows all sessions going to a particular dest IP and port
show session id – shows the specifics behind a particular session by entering the ID number after the word "id”
show counter interface – shows interface counters
show counter global | match drop – used to troubleshoot dropped packets
show counter global delta yes | match [ drop | error | frag ] – show counter changes
since last time ran this command, filter on particular keyword

NAT

show running nat--policy-- shows current NAT policy table
show running ippool-- use to see if NAT pool leak
test nat--policy--match – simulate traffic going through the device, what NAT policy will it match?

Routing

show routing route – displays the routing table
test routing fib--lookup virtual--router ip -- finds which route in the routing table will be used to reach the IP address that you are testing

Policies

show running security--policy – shows the current policy set
test security--policy--match from trust to untrust destination -- simulate a packet going through the system, which policy will it match

PAN Agent

show user pan--agent statistics – used to see if the agent is connected and operational. Status should be connected OK and you should see numbers under users, groups and IPs.
show pan--agent user--IDs -- used to see if the FW has pulled groups from the PANAgent
show user ip--user--mapping – used to see IP to username mappings on the FW
clear user--cache all – clears the user--ID cache
debug device--server reset pan--agent -- reset the firewall’s connection to the specified agent

URL

test url – used to test the categorization of a URL on the FW
tail follow yes mp--log pan_bc_download.log – shows the BrightCloud database update logs
request url--filtering download status – shows the status of the database download (essentially the very last line from the pan_bc_download.log file)
debug dataplane show url--cache statistics– shows statistics on the URL cache
show counter global | match url – shows statistics on URL processing
clear url--cache – used to clear the URL cache-- cache contains 100k of the most popular URLs on this network
show log url direction equal backward-- view the URL log, most recent entries first

To test connectivity to the BrightCloud servers:

 ping host service.brightcloud.com
 ping host database.brightcloud.com

Log viewing / deleting:

show log [ system | traffic | threat ] direction equal backward – will take you to the end of the specified log
show log [ system | traffic | threat ] direction equal forward – will take you to beginning of the specified log
clear log [ traffic | threat | acc ] – clear everything in the specified log

Software, Content, and Licenses

To upgrade the software on the FW:

tftp import software from file
request system software install file
request restart system
request system software [info | check | download | install ] –manipulate PANOS software from the CLI

To upgrade the content on the FW:

tftp import content from file
request content upgrade install file
request content downgrade install previous –downgrade to the previous content version
request system private--data--reset-- to clear config and logs/reports
debug swm [ status | list | revert ] – will show possible code to install, or code that was installed. “revert” is used to revert to last running OS version without having to do a
factory reset (such as from 4.0 to back to 3.1)
request license info – shows the license installed on the device
delete license key ? – use to delete a license file if having issues and want to retrieve new licenses, use question mark to list file names, only delete the files you see fit

Config diff/force/cli format

show config diff-- compares two versions of the config
commit force-- perform a commit, even if there are errors
set cli config--output--format set-- use to view the config  in “set” format from within the configure prompt (#)

IPSec

To view detailed debug information for IPSec tunneling:
          1. debug ike global on debug
          2. less mp--log ikemgr.log

Misc

set deviceconfig setting session tcp--reject--non--syn no – used to ignore SYN when creating sessions; confirm command took effect with show session info
set deviceconfig setting session offload no –-- makes all packets go through CPU, otherwise all fastpath packets just go through EZ chip (turns off session offload to fastpath); confirm command took effect with show session info
debug dataplane pool statistics -- this will show the different dataplane buffers and can e used to see if the system is nearing capacity in certain functionality.


Wednesday, August 10, 2011

Deploying an Amazon MySQL RDS Instance

by Semir H.


If you find this tutorial useful, please consider making a donation to support future work like this:


Thank you :)

Preparation:

Decide in which Region you will create this.
Decide on the DB Engine (MySQL or Oracle).
For this tutorial I will use the following:

Multi AZ Deployment = Yes
Allocated Storage = 5 GB (minimum - good enough for this tutorial)
DB Instance Identifier = TestDB-Inst
Master Username = dbadmin
Password = whatever you want

Procedure:

Log into your Amazon Web Services (AWS) Management Console. Go to the Amazon RDS tab. Pick your Region. Click on “Launch DB Instance”.
In the “Engine Selection” pick MySQL and click on “Select”.
Fill in the “DB Instance Details” as per your needs. I’ll use the details I put down above. Click on “Continue”
Example:


On the “Additional Configuration” part leave everything at defaults (no need to put a DB name now). Click on “Continue”.

On the “Management Options” pick your Backup Retention Period (e.g. 1 day), Backup Window and Maintenance Window. Click on “Continue”.

Review your settings and if you are happy, launch the DB Instance.

DB Security Groups (connecting EC2 to RDS):

To make sure a particular EC2 Instance (in my case an Ubuntu Linux one) can connect to the Amazon RDS MySQL Instance we just created we need to create or modify an existing DB Security Group. I’ll just modify the default one.
Go to Amazon RDS tab and click on the “DB Security Groups” link.
Click on the “default” DB Security Group.
Under “Connection Type” pick “EC2 Security Group”.
Put in your Security Group name (in my case it was “linux sec grp”) and the AWS Account ID of the AWS account where this EC2 Security Group is. The number is a 12 digit number without any dashes.
Click on “Add”. If all goes well you should see that the connection you just defined will be authorised. Here’s an example (with my personal details blacked out):


This will essentially let any EC2 Instance (my Linux Instances) that are controlled by my “Linux Sec Grp” Security Group be able to communicate with my new MySQL RDS Instance.

To connect to the new MySQL Amazon RDS Instance (TestDB-Inst) we’ll need to find the Endpoint address. We do that by clicking on the DB Instance and looking under its Description. In my case it is “testdb-inst.cheuhkpk9v6o.ap-southeast-1.rds.amazonaws.com”.

Testing connecting:


# mysql -h testdb-inst.cheuhkpk9v6o.ap-southeast-1.rds.amazonaws.com -u dbadmin -p

Enter the password and there you go, you are now connected to your MySQL Instance.
You may now create databases for your projects.

Sunday, August 7, 2011

Attach additional Volume(s) to AWS EC2 Linux (Ubuntu) Instance(s)

by Semir H.

This quick tutorial will show you how to create a new EBS volume in AWS EC2 and attach it to an existing EBS backed Linux (Ubuntu) EC2 Instance.

If you find this tutorial useful, please consider making a donation to support future work like this:


Thank you :)

Preparation:

Please note down which Availability Zone (AZ) your existing Instance is in. You will need to create the new volume in the same AZ. Also note down the Instance identifier (starts with “i”) for easier identification later.
Please also schedule some downtime for your Instance (if it is an important one) as you’ll need to shut it off while the volume is attached and it will need to be restarted at least once for testing.

Procedure:

As an example I have an Ubuntu Instance here with 8 GB of disk space that comes with the Ubuntu EC2 AMIs.


To create a new volume to add to the Instance go to Volumes section of the Amazon EC2 portion in the AWS Management Console. Click on “Create Volume”.


Fill in the desired size of the Volume (my example is 20 GB) and make sure you pick the correct AZ (same as where the Instance you will attach this to is). Ignore the Snapshot. Click on “Yes, Create” to make the Volume.


Once it is created you should right-click on it and select “Attach Volume”.
Select the correct Instance and put in the device name. The default for the Device will usually do.
Click on “Yes, Attach” to proceed.
Example:


After a bit you should see the Volume listed at attached to your Instance. Here’s an example of the original 8 GB Volume and the new 20 GB Volume attached to the same Instance:


Now go back to your Instance and start it up. Log in and check if the new Volume can be seen. The quickest way of doing it is to execute “fdisk -l” as a privileged user. The example below shows the original 8 GB and the new 20 GB device.


Of course, the new Volume is unusable in this state so we’ll need to create a mount point for it, create a file system for it and mount it. We’ll also make sure it auto-mounts after the box is restarted in the future.

First, we’ll create a new mount point. “mkdir /newdisk”. This will create a folder “newdisk” in the root of the current system.

We’ll then run cfdisk on the /dev/xvdf device to create a usable partition. Please see the cfdisk documentation for more details. I basically create a new primary partition (called xvdf1) using all the available space.
Then, we’ll create a file system for the new partition. Let’s go with ext4. Command is “mkfs.ext4 /dev/xvdf1”.  You can now mount the partition under the folder we created earlier. Command is “mount /dev/xvdf1 /newdisk/”. Please check you can write to it.
Next, we’ll make sure the new partition is auto-mounted on system start-up. We do this in the /etc/fstab file. Just add the following line (no quotes):

“/dev/xvdf1      /newdisk        ext4    defaults        1       2”

Please see the fstab documentation for options. You may want to use different options for your own environment.
Save the file. Restart the system to test it. When you log back in you should see the new partition mounted in the correct folder and you should be able to write to it.
Example (df -h):

Thursday, August 4, 2011

How to change AWS EC2 Security Group of an existing Instance

By Semir H.


If you find this tutorial useful, please consider making a donation to support future work like this:


Thank you :)

Scenario:

You have a few pre-made Security Groups and one of your Instances needs to change from one to another.

Solution:

AWS EC2 does not have a way to easily switch these. You basically have to clone the Instance into an AMI and then deploy a new Instance out of that AMI, taking care to associate the new Instance with the desired Security Group at the time of creation.
You can delete the AMI and the associated Snapshot, if you desire so.

Process:

Create a Security Group with your desired port settings.

Clone your Instance by right clicking on it and choosing to create an Image (EBS AMI). It is best if the original Instance is turned off so that no data is lost.


After a bit of time your new AMI should be visible in the AMIs section. Please make sure you’re in the correct Region.

Right-click on your new AMI and pick “Launch Instance”.


Use the “Request Instance Wizard” to select settings you wish but please make sure you select the correct Security Group during this process.
You may also take this opportunity to change your Key Pair.


Finish the wizard and launch the Instance.

You should now see that the new Instance has the new Security Group associated with it.
Log into your new Instance and confirm that no data is missing.

Cleanup:

Once you are sure no data is missing and that you will not need your original Instance or the resulting AMI then you can delete both.
Also delete the Snapshot that was made during the cloning process.

Monday, August 1, 2011

AWS EC2 Security Group (Firewall) Design and Creation

By Semir H.

This quick tutorial will show you how to open up some common ports on the AWS EC2 Firewalls, otherwise known as Security Groups. Please note that you should think about the Security Group design before you create Amazon Web Services (AWS) EC2 Instances. Once created and associated with a Security Group, there is no easy way (but there is a way) to associate an Instance with a different Security Group. I’ll show you how you can do it in another tutorial.

Let’s say we want to open TCP port 22 for SSH access to a Linux machine, ports 80 (HTTP) and 443 (HTTPS) for web access and port 10000 for Webmin. We want the HTTP/S ports to be open to anyone on the Internet but we want to restrict access over SSH and Webmin ports to a certain IP. The IP we will restrict it to will be 1.2.3.4 (obviously made up).


If you find this tutorial useful, please consider making a donation to support future work like this:


Thank you :)

Procedure:

Log into your Amazon Web Service (AWS) Management Console.

Navigate to Security Groups in the NETWORKING & SECURITY section.

Click on the “Create Security Group” button.

Give it a Name and a Description. Leave the VPC option as “No VPC”. Click on “Yes, Create”. Example:


Select the newly created Security Group and click on the Inbound tab at the bottom of the page to create new rules.

HTTP(S) and SSH can be pre-selected from the “Create a new rule” drop-down box. Webmin port will be the custom option.

Finally, click on “Apply Rule Changes”.


To put in a single IP as the Source you need to put the netmask as /32.
So our fake 1.2.3.4 address will be entered as 1.2.3.4/32

As you add the rules they will appear to the right of the rule creation area. You will see a message saying “Your changes have not been applied yet” until you apply them. To apply them just hit the “Apply Rule Changes” button.

Here’s what our finished example looks like:

Friday, July 29, 2011

How to increase disk space on existing AWS EC2 Linux (Ubuntu) Instance without losing data

By Semir H.

Let’s say you have a Linux Amazon Web Services (AWS) EC2 Instance up and running and you start running out of space. I’ll show you how to quickly clone its disk (EBS volume) onto a bigger disk (also EBS), replace the smaller disk with the bigger one and boot off the bigger (new) disk. No need for any third party tools like Acronis or Ghost or even rsync.


If you find this tutorial useful, please consider making a donation to support future work like this:


Thank you :)

Create Snapshot of the original disk:

First thing we’ll do is to create a Snapshot of the original disk so that we can then create a new, bigger volume out of that Snapshot. There are a couple of things we have to note down first: the Instance number and then the volume attached to that Instance. The easiest way to fine the Instance number is in the Instances part of the AWS Management Console. It will start with “i” and be under the “Instance” column. Now navigate to the Volumes section (Elastic Block Store section) and locate the volume that is attached to your Instance. You can see the Instance number under the “Attachment Information” column. The first half of that string will be the Instance number. Please see the images below for an example.

Instance (in this case number is i-1920b74c):


Please also note which Zone your Instance is in. This will be important for later. In my case the Zone is “ap-southeast-1b” in the Singapore Region. The Zone can be seen by selecting the Instance and looking under its Description tab (bottom).

Volume (note the Instance number):


As you’ll notice in the examples above, the size of the original Volume (EBS Disk) is 8 GB. I’ll increase that to 25 GB.

Creating a Snapshot

To create a snapshot of the Volume you simply right-click on it and click on Create Snapshot. Or you can select the Volume and click on the Create Snapshot button at the top.


Please note that I am creating a Snapshot of the running virtual machine. If you have a database on it or some other application that has a lot of transactions happening then it would be best to turn the virtual machine off (schedule some downtime) and do the Snapshot.

Give the Snapshot a meaningful description and a name. Click on “Yes, Create”.


Once done, you will be able to see your Snapshot in the Snapshots part of the Elastic Block Store area. See example below. Please note the Name, Description and Capacity (original 8 GB).


Creating a new (clone) Volume

Next, we’ll create a Volume out of the Snapshot. Simply right-click on the Snapshot and select “Create Volume from Snapshot” from the resulting menu or you can use the button at the top.


Put in the desired Size of the new Volume and make sure the Availability Zone coresponds to the AZ that the original Instance is in. Click on “Yes, Create”.


If you navigate to the Volumes section you will see the new 25 GB volume there. You’ll notice that it is not in use.


Attach new Volume to existing Instance:

And now for the fun part. We will stop the Instance, detach the original 8 GB Volume, attach the new 25 GB Volume and make sure we are able to boot. Please note the new Volume will have the data up to the point when the Snapshot was taken. If the original machine had more data put onto it since the Snapshot then that will have to be dealt with. This is beyond the scope of this tutorial.

Stop the Instance (if it is running).

Go to the EBS Volumes section, select the original Volume, right click on it and select “Detach Volume”. You can also use the Detach Volume button. When prompted, please select “Yes, Detach”.


To attach the new Volume right-click on it and select “Attach Volume”.


Make sure you select the correct Instance. In the example below I am also modifying the Device to be the same as the original one. The example is for a Linux (Ubuntu) Instance. This is important. Click on “Yes, Attach”.


The Status should change to “in-use”.

Go back to your Instance and start it up. Log back into your Linux Instance and run the following command (for ext3 file system):

    resize2fs /dev/xvda1

Please note that the device is not called sda1 but xvda1. The device was renamed by the Kernel.
After it is done you should be able to see the full 25 GB. use the “du -h” command. Example:


Cleanup:

Once you’ve made sure all works as it should and that all your data is fine on the new Volume, you can remove the Snapshot and the old Volume if you do not intend to use them anymore. Go to the relevant AWS Management Console sections and remove (delete) them.

Thursday, July 28, 2011

Replace a lost Key Pair an existing AWS EC2 Instance uses

By Semir H.

This tutorial will show you how to use a new Key Pair with an existing Linux instance.

If you find this tutorial useful, please consider making a donation to support future work like this:


Thank you :)

Problem:


You have an existing EBS (root device) based Instance with data on it that needs to be saved. The original Key Pair has been lost so you can’t log into the Linux Instance. You need to get to the data on the virtual machine.

Solution:

We’ll clone the running Instance and re-deploy it but with a new Key Pair. We can either use a pre-made Pair or create a Pair while we’re re-deploying. My example uses Ubuntu but should apply to other flavours as well.

Creating an Image:

Log into your Amazon Web Services (AWS) Management Console, go to Amazon EC2, pick the Region where the Instance in question is running and click on the Instances link. Right click on the Instance in question and select “Create Image (EBS AMI)” from the resulting menu.


Give it a Image Name and a Description and click on “Create This Image” button. Example:


The process will now begin.  Close the notification window.

Once the AMI is created (won’t take long) you should see it in the "Images" - "AMIs" part of your Amazon EC2 AWS Management Console. Please make sure you are still in the correct Region. Example:


Creating new Instance out of the new AMI:

Go to Images AMIs, locate your recently created AMI, right-click on it and select “Launch Instance” from the resulting menu.


Follow the prompts to finish creating the Instance (see my previous post) but make sure you select the correct Key Pair (one you create earlier, not the lost one) in the “Create Key Pair” section. Example:


All other settings should be the same as for the original Instance.
After a little bit of time your new Instance should be up and running.
Here’s an example below. Please note the different Key Pairs.


You can now connect to it, using your new private key, and confirm that all your data is still there.
Once you confirm no data is missing you can stop the old Instance and eventuality terminate it (after making absolutely sure you will never need anything from it).

Cleaning Up:

You can now de-register the AMI (unless you want to use later again).


You should also go to EBS - Snapshots and delete the Snapshot of the disk that was created when the AMI was made (unless you intend to use it for something in the future).